
Below is the Stock .zip file.
| oscar_wallpaper_stock.zip |

|
First create a canvas with the dimensions 1366x768, or use the dimensions of your desktop screen if you wish.
|

|
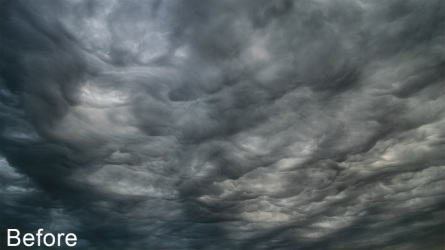
Now we need to make the clouds a lot lighter, so they look almost white. We will do this by using adjustment layers. You need to add two adjustment layers, a levels and an exposure layer. On the Levels the digits must be in this order: 0,2.36,181. On exposure the first slider must be at -0.02, the second, +0.3339 and the third at 1.26.
|
|

|
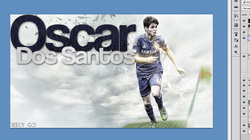
Now your image should look something like the 'after' image...
Next, you need to add text saying 'Oscar' and 'Dos Santos', directly below it. I used the font coolvetica but a font like helvetica or even ariel bold should work.

Change the Oscar text colour to 15162c. It should be a navy colour. Change the Dos Santos colour to e9e9e9. It should be a light grey.

Place Oscar into the document underneath both of the text's so that they are slightly over his arm.
Now we need to use adjustment layers on Oscar. First, go to layer>new adjustment layer>black and white. Click the layer mask and with a 50% grey soft brush carefully paint over his kit, socks and boots. Not his skin. Then with 10% grey soft brush paint over his skin. (The percentages mean how far down the colour selection box, 0% is white and 100% is black.)

If you have Topaz Adjust use dynamic range 2 here. (If not, its worth downloading the trial for 30 days..).
If you dont have Topaz Adjust duplicate the black and white layer, delete the mask and replace it with a mask of the selection of the oscar render then set the layer to overlay.
If you dont have Topaz Adjust duplicate the black and white layer, delete the mask and replace it with a mask of the selection of the oscar render then set the layer to overlay.
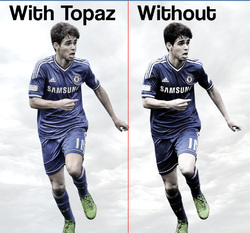
With and without Topaz Adjust 5.
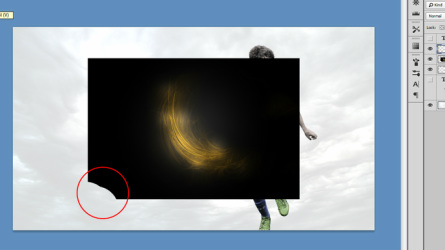
Next open the image 3 (2) and place it in the document. Delete the watermark using a brush. Then change the layer to linear dodge, this deletes the black background and amplifies the orange flame effect.

Transform the flame using CTRL+T and move it on to Oscar's arm. Duplicate and repeat this for the other arm. Click on the picture on the left to enlarge it.
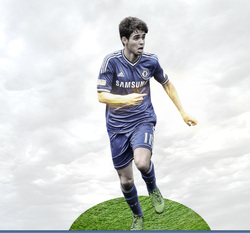
Place the grass below and behind Oscar. Then use the ellipse tool to make a selection like it was a hill (shown on the left). Press CTRL+SHIFT+I to invert then CTRL+X to delete.
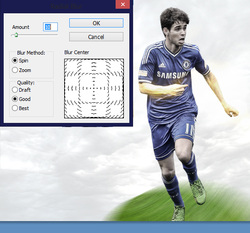
Use radial blur with the settings in the picture to make the grass blurred.

Place the flag image and isolate the flag. Transform it like I have done in the picture then use radial blur with the same settings as in the last step.
You can use the other stock I provided to make the picture look even better! The ones with a white background use layer mode: Multiply and ones with a black background use: Screen.
Potential final product:

